"Getting Things Done" with Todoist
This note describes how I have implemented the Getting Things Done (GTD) framework with the to-do list app Todoist. This approach can almost certainly be transferred to other tools like Microsoft To-Do or TickTick. I did like the look and features of Todoist the most, which is why I chose this app. I took some inspiration from their article about the GTD framework but made adjustments at different places.
GTD Framework Overview
For an in-depth summary of the GTD book and framework, see my book summary article.
The 5 general steps of the GTD framework are in a short form:
1. Capture
Capture anything which is on your mind - big or small - in an inbox. This inbox should become part of the lifestyle and always be available The inbox should be emptied regularly by clarifying tasks and organize them into your system
2. Clarify
To clarify the task, add additional information, identify the next concrete steps and decide if it is just a task or a project should be created
3. Organize
Organize the tasks by assigning them to projects, schedule tasks in the calendar if required and create the next actions list.
4. Reflect
Reflect and update your lists and tasks once a week by emptying the inbox, update the lists and review the system.
5. Engage
Deciding what to do at any point in time will still be an intuitive call → But you have all information at hand to make a confident choice.
1. Capture
The capture step is probably the most important step of the GTD framework. By externalising your tasks into a system outside of your head, you prevent to have to think about it, freeing up the mind to think about other problems.
In Todoist, the Inbox serves as the place where all your tasks and ideas should be collected for further clarification or organization. It is important to capture anything right away. If you have a task which takes less than two minutes, complete it right away instead of feeding it into the system.
Make sure to configure the "Quick Add Task" shortcut in Settings / Advanced to easily add tasks from your PC. The Todoist app provides a possibility to add tasks easily on the go.
2. Clarify
I do the clarify step once a week or sometimes also on demand. Some tasks need to be organized before the weekly review (see step 4) and are therefore clarified earlier.
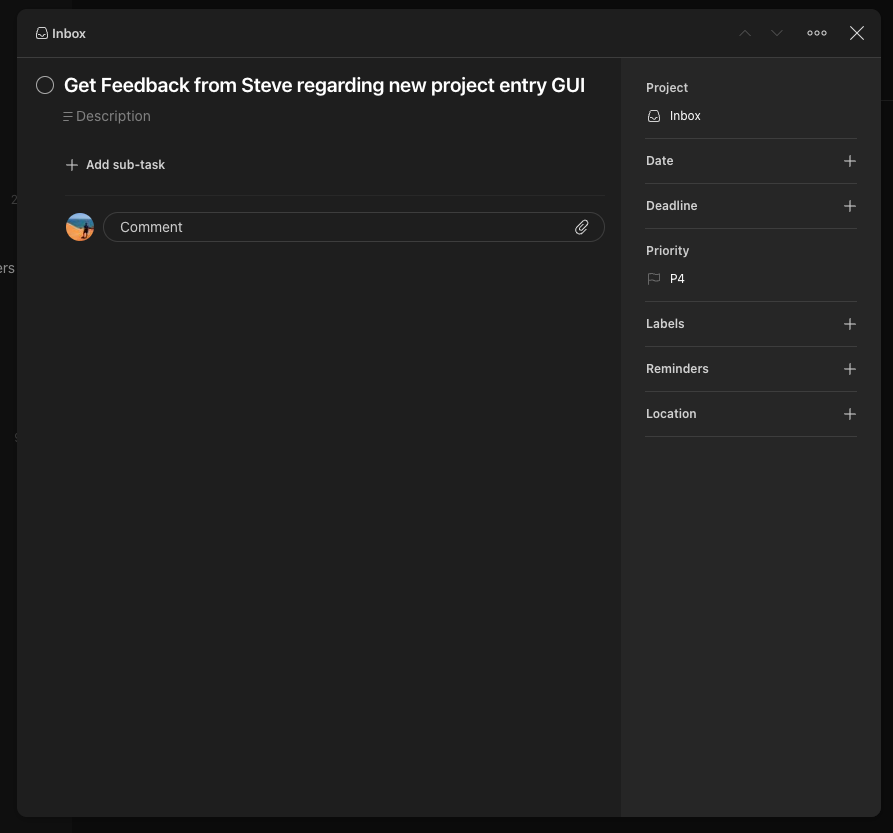
In the clarify step, I add additional information to the task. The goal is to end up with a task which contains clear, actionable steps. Further information such as links to Jira issues should be added as well to improve efficiency. Todoist allows to add a Description to a task and to attach files if required.
3. Organize
The organize step is also part of the weekly review done on Friday (see step 4).
During the organization step I go through the Inbox and do different things, which can all be done in the project editing window of Todoist:
Project Organization
Todoist allows to create a list of projects. Each task coming from the inbox is assigned to a project. If you have a set of tasks which belongs together but not to one of the existing projects, add a new project to organize them.
I use two special project types:
One-Off Task
Tasks which consist of only a single step and do not need a separate project go into the "One-Off Task" project.
Someday / Maybe
Tasks which you know that you are not able to work on soon but you would still like to complete in the future can go into the "Someday / Maybe" project. The content of this project should be review regularly.
Task Labelling
The next step is to label the tasks. Labels can be added in Todoist by typting "@" followed by the label in the task entry field, or by selecting a label from the list on the right hand side.
@next
The most important label I use is the @next label. All tasks which have the @next label, are actionable tasks which I are ready to e completed. This means that all information is available to start this task.
@waiting
For a task which I need to complete personally but am waiting for feedback from another person or for some system which is not yet ready, I assign the @waiting label.
@home & @work
I use Todoist to track personal tasks as well as work tasks. If a certain task can only be completed at home or at work, I assign one of these labels.
@5min, @15min & @30min
These labels are used for short tasks which can be completed in the time designated by the label. This is helpful for those times when you only have 15 minutes left before the next meeting and allows you to use these short windows of time scattered around the day.
Dates
For tasks with a defined deadline, I do add a date when that task needs to be completed. The tasks which need to be completed in the coming days appear in the "Next Tasks" filtered list, even when they do not have the @next label (more on this filtered list later).
Priority
Priority is a concept which I have only started to use with time. I discovered that due to the involvement in a multitude of projects, the "Next Tasks" list can become very long and convoluted. By assigning a priority, I can group the more important tasks at the top of the "Next Tasks" list. I only use the priorities 1 and 2, Todoist offers 4 different priorities.
4. Reflect
The reflect step is the regular work which is put in to keep the system healthy and ready. I do it weekly on Friday, when I set aside one hour to go through my tasks. To help with this, I use a separate project which contains a list of the task I go through in every weekly review (see here for a template). My version looks like this:
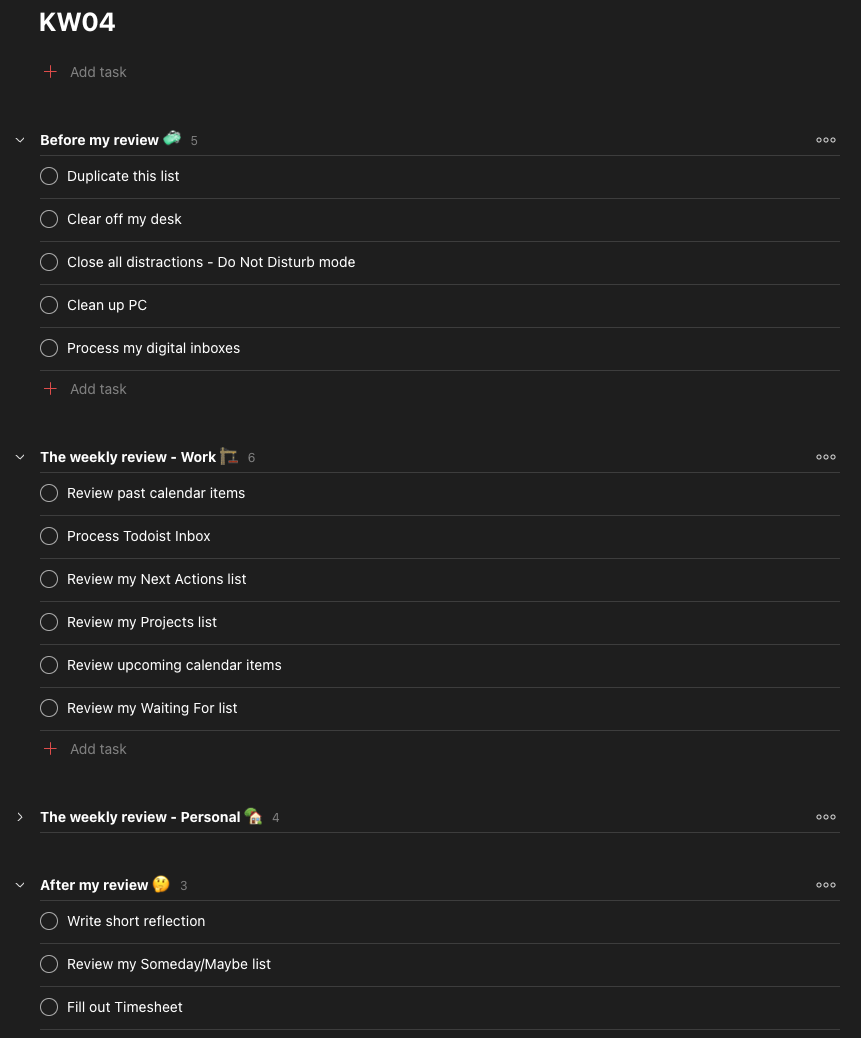
The first section of the weekly review is some general clean up work and getting into the zone to start with the GTD review.
The main part is the second section where I do the following steps:
- Review past calendar items: Looking through the calendar can help to remember task which slipped through during the week. I add these to the inbox.
- Process Todoist inbox: Here I execute step 2 (clarify) and step 3 (organize) on all the tasks in the inbox
- Review my "Next Tasks in Work" list: I go through the next actions lists and check if all items there are still relevant, that I didn't forget to cross something off and maybe adjust priorities or deadlines
- Review my projects list: Here I quickly go through all the projects and check if the tasks need adjustment, requalification or any other changes
- Review upcoming calendar items: I have a quick look at the calendar of the next week and check if there are any preparations I need to do for a meeting which are not yet a task
- Review my "waiting for" list: Check the waiting for list so see if I need to follow up on anything with someone
The third section is a lighter version of the work section for the personal task list.
I end the review by writing a short productivity review of the week (no more than two sentences) and fill out my timesheet.
5. Engage
With the review out of the way, I can start on Monday morning immediately with working on the tasks. To get a list of all the relevant tasks from all projects in one place, I use a filtered list. Todoist allows to write queries on task properties to get an accumulated list of tasks. The query I use for the "Next Tasks in Work":
(@next | 2 days | P1) & ##Work
This gives me a list of all tasks which are subprojects of the "Work" project, which have either the @next label, are due in the next two days or have priority 1.
Closing Thoughts
This is all there is to it. Implementing the GTD framework helped me tremendously to tackle the daily challenges efficiently. By getting used to add all tasks to the inbox immediately, i do not need to worry about forgetting tasks. The "Next Tasks in Work" list helps me to immediately get an overview on which tasks I can work on and help me to work efficiently.